Oh my goodness – I’ve missed most of MoFo V – and will continue to miss it, unfortunately, due to circumstances largely out of my control – but nothing, not a thing can stop me from sharing this recipe with you.
When I went gluten free, it was a cold turkey kind of deal. It was easy in the sense that I don’t enjoy being sick, of spending a day doubled over with knife-jabbing stomach cramps, of the constant fogginess and fatigue that so often accompany gluten intolerance. However. I still miss the ease of baking sourdough bread with three or four ingredients; the enjoyment of punching down pizza dough between rises; the purchasing of pasta that doesn’t cost a small fortune. When I make something for my daughter that contains the spelt or wheat flours I still have in the pantry, I miss being able to lick batter off the spatula. I miss the p-l-i-a-b-i-l-i-t-y of gluten. I miss the silkiness of spelt flour. I miss, I miss, I miss.
But what I miss most of all are those damned vital wheat gluten-based chickpea cutlets.
Yeah, you know the ones.
In a fit of anger I decided that enough was enough, already! If I’m going to mope around and bitch about how much I miss those cutlets, then I should at least attempt to make them gluten free. And then after failing miserably, I can have a proper bitch session.
Thankfully, things did not go according to plan.
[MoFo theme disclaimer: In case you’re wondering, I did not owlize these in any way. If that bums you out, sorry, but there are still a few days to go so fingers crossed that I get another chance to post something. Besides, I figure I’ve missed so much of this year’s MoFo that my theme has defaulted from Owlowe’en to Holy Crap I Actually Participated!]
 right out of the skillet, still piping hot
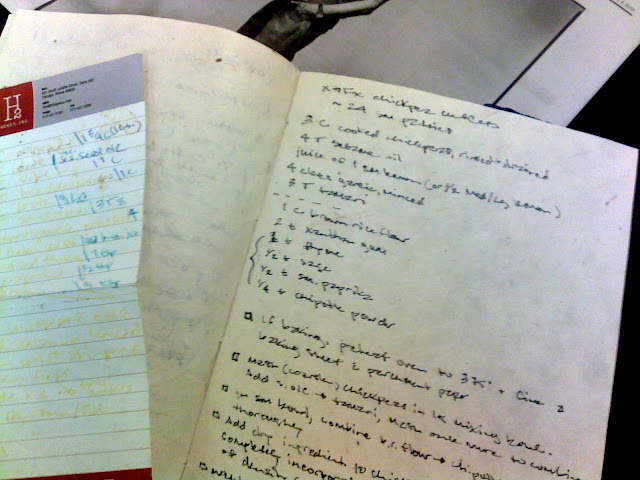
Gluten Free Chickpea Cutlets
Yields 24 small cutlets or 9 large
{wet ingredients}
3 C cooked chickpeas, rinsed and drained
4 T toasted sesame oil
Juice of 1 small lemon, or ½ of a medium or large lemon
4 large cloves garlic, minced
3 T gluten-free tamari
…………….
{chia/flax slurry}
1 T flax or chia seeds, ground (measure before grinding)
4 T boiling water
…………….
{dry ingredients}
1 C brown rice flour (may sub another gf flour, see note)
If not using chia or flax seeds for binding: 1-2 tsp xanthan gum (see note)
2 tsp dried thyme
1 tsp rubbed sage
½-1 tsp smoked paprika, to taste
¼ tsp chipotle powder (optional, no need to up the smoked paprika if you omit this)
If baking – do ahead: preheat oven to 375 degrees and line a baking sheet with parchment paper.
Mixing the wet ingredients: Coarsely mash the chickpeas in a large mixing bowl. Add the oil, lemon juice, garlic and tamari. Mash again a couple of times to mix in the liquids. Chickpeas should be broken up; some smooth, some still partially whole.
If using chia or flaxseed slurry instead of xanthan gum: Grind the chia or flax seeds, place in a small bowl and add the boiling water. Stir quickly – this will thicken up immediately! Once it thickens up, fold it into the wet ingredients.
Mixing the dry ingredients: In a small bowl, combine the dry ingredients and stir with a fork until thoroughly blended. If using xanthan gum instead of the slurry, add it here.
Cutlet making: Add dry ingredients to wet, and stir until fully incorporated. The mixture will be thick – sort of like cookie dough, but not as sticky. If too wet, add a bit more flour; if too dry, add a bit of water. The density will be similar to bread dough, but the consistency will be lighter. Basically, the mixture will resemble bread dough, minus the stretchy strands of gluten. RESIST the urge to add additional xanthan gum – 2 tsp is already more than enough! Also, there is not enough smoked paprika in the world to mask the flavor of xanthan gum if you use too much. Consider yourself warned.
Wet your hands and shape into cutlets, nuggets, or whatever size/shape you desire. They should be about ½ inch thick; these won’t puff up like the gluten-based cutlets do. We prefer ours to be the size of little breakfast patties – about the size of a smooshed falafel ball. This makes them easy for snacking, easy for pita- or tortilla-stuffing, easy to pack into one’s lunch.
If baking – do now: Line your cutlets up with half an inch or so of space in between them. Bake for 15 minutes on one side; flip; bake for an additional 15 minutes. These cutlets don’t brown much while they’re in the oven, but seem to darken a little once they’ve cooled. Feel free to brush them lightly with oil before baking, if that’s your thing. I don’t do this (it sort of defeats the purpose of baking them), so I’m not sure if they brown much more with the oil.
If pan frying: Lightly oil a cast iron skillet and put over medium (not high) heat. Use one that has a lid, because these are going to be covered. Instead of sizzling these poor cutlets to death in an oil bath, we’re going to use the heat trapped under the lid to cook them through while they’re browning. So. When skillet is heated, arrange cutlets so that there is about an inch of space between them. Cover partially with a lid and check them in 5 minutes. When cutlets are lightly browned, give ‘em a flip, re-cover skillet, and set your timer for another 3 minutes or so.
 Use a lid, and I promise you won’t be disappointed.
Notes
- Just like their glutenous counterparts, gluten free flours all have their own attributes like density and absorption. I imagine almost any gluten free flour or combination of flours would work in this recipe, as long as you add a little more flour or liquid if needed.
- Xanthan gum is used in these primarily for moisture retention, secondarily for texture. If you’re going to gobble these up in 24 hours or less, then 1 tsp of xanthan gum should be enough. If you plan on making a big batch and snacking on these all the live long week, then you might want to up your gum to 2 tsp. My snack-a-lacking family prefers the latter, and despite my
hatredaversion for gums it really does make a difference if you want them to last a week without turning into crumbly clods of dried up chickpeas. - Ground chia or flax seed slurry does an excellent job in these if you prefer to make them without any gums. They will lose moisture faster, though, so be sure you have time to eat these before they turn into clods.

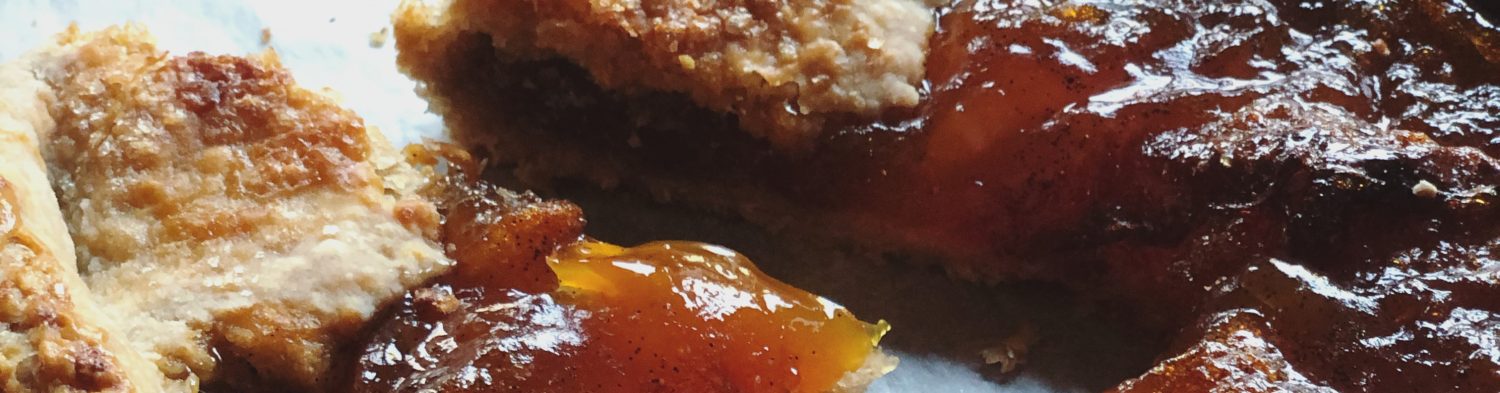
xGFx kalamata olive boule teaser – recipe is in the final stages of tweaking!

Day 5 (batch made with xanthan gum), and still not dried out. I think xanthan gum was in an X Files episode, right? That stuff seriously freaks me out.
Recipe adapted from Isa Chandra Moskowitz’s legendary recipe found in Veganomicon and at the Post Punk Kitchen


THIS IS VERY PLEASING TO ME
*bookmarked*
(also I was just thinking about you today, hope all is well!)
LikeLike
All is well, I’m just SWAMPED from Every! Single! Direction!
It has been *KILLING* me not to comment on your site this month but if I don’t stay out of the fray I’ll fall down the internet rabbit hole . . .
LikeLike
Thank you so much for the recipe! I keep hearing raves about the original
LikeLike
You’re welcome!! Let me know what you think – I’m especially curious in feedback from those who haven’t had the original.
LikeLike
Thank you from a fellow non glutenized person! These sound delicious and I’ll be trying them soon!
LikeLike
You’re so welcome – hope you like them as much as we do!
LikeLike
Awesome! I used to love these cutlets before I stopped being able to eat gluten!
LikeLike
Tell me about it – I made them all. the. time. Hope you like these!
LikeLike
Yay! Just in time for the holidays! I was wondering how I was going to pull off Thanksgiving this year without Chickpea Cutlets!
LikeLike
Now you just need the perfect gravy! I *always* make this one with shitakes and thyme (and gf flour, of course). http://chewonthisvegan.wordpress.com/2010/12/16/shitake-thyme-gravy/
Oooh, and maybe some colcanon and roasted Brussels sprouts . . . now you’ve got me fantasizing about Thanksgiving. 🙂
LikeLike
I love making gluten free chickpea cutlets, they make such a great dinner
LikeLike
These look great, tamari and sesame are both allergy issues in our house but otherwise these would be safe for us, yay!
LikeLike
You can easily sub soy for tamari and olive or sunflower oil for the sesame. I hope these works for you!
LikeLike
My boyfriend figured out how to make gf chickpea cutlets too…omg I am obsessed!
LikeLike
That’s awesome! I’m obsessed, too – my fave way to eat them right now is in a sandwich or a wrap with some shredded greens, sliced red onions and xgfx mayo!
LikeLike
have you tried flax seed substitute/non gum substitutes yet? successes/failures/suggestions? THANKS!
LikeLike
hey there! I already updated the recipe a few weeks ago, and both flax and chia work really well!
LikeLike
HI,
If a recipe (particularly baking) calls for 1 teaspoon of xanthan gum is it a straight ratio replacement of the chia/flax slurry?
LikeLike
Hi Lisa – so sorry I didn’t see this and respond earlier! I have found that a lot of baking recipes that call for xanthan gum don’t need it AT ALL. However, if I am going to use it, I will use a slurry if it will blend into the recipe well, or else I will simmer whole flax seeds in water (you can also microwave them, check every 30 seconds) and strain off the thickened goop. It will have the consistency of egg whites.
For ground flax/chia, I use the ratio listed above (1 T flax/chia:4 T boiling water) to equal 1 tsp xanthan gum. This works best in muffins, cakes, etc.
For the flax goop, to equal 1 egg/1 tsp xanthan gum, I combine 1 tsp flax seeds with 4 tsp water and then simmer until the water has the consistency of egg whites. If this is for a recipe that I don’t want the flax seeds to show up in (a white cake or delicate cookies, for example), I strain them out with a mesh sieve. If it doesn’t matter, I add the goop and seeds to my batter.
Hope that helps!
LikeLike
Thanks for this great gf recipe!!! They look delicious. One question…do they require 4 Tablespoons of oil or 4 teaspoons?
LikeLike
Hi Darlene — that would be four tablespoons. Let me know how these turn out!
LikeLike
Pingback: Cooking extravaganza weekend | Fork off, heart disease!
Hello, I stopped by to say thank you for the recipe provided, I love chickpea and for some reason I like to cook it too, so this recipe is just what I need. Thank you very much for sharing this one here!
LikeLike
You’re very welcome — I hope you like it!
LikeLike
Pingback: Test Report: Vegan, Gluten-Free Chickpea Cutlets |
Pingback: Macaroni and Cheese and Chickpea Cutlets « Oats From the Underground
Thanks so much for sharing this recipe. I halved the recipe so I could try it first. My cutlets came out with a pasty, mushy texture. I know I shouldn’t compare it to meat or Seitan but I didn’t feel mine had enough springy mouth feel. Did I mess up the recipe, or is this the texture for this particular recipe?
LikeLike
Hi Lavender – my guess would be that your cutlets were not cooked all the way through, because they should definitely have a springy, chewy texture! When cooked thoroughly, they are as firm as their vital wheat gluten counterparts. When I pan fry these, that’s why I cover them – to trap as much heat as possible. If you bake them it’s pretty difficult to over bake them. I’m sorry they didn’t work out for you, but if you try them again make sure the cutlets aren’t more than 1/2 inch thick!
LikeLike
Wow, what a quick reply – thanks!
In that case, I will definitely try this again – I could very well have not cooked them long enough. I had to rush so I didn’t take the time to time how long I cooked it. They had a great flavour so if I can just get the texture right then I will be in meatless protein heaven! Thanks so much for sharing this.
LikeLike
Oh, I hope they work out for you! One thing I do if I’m short on kitchen time or have to leave and don’t have anyone to mind the stove/oven for me, is I bake them for as long as I’m able and then leave them in the oven while it cools down. Anyway, I hope you like these when you make them again. 🙂
LikeLike
Okay so if I do a pan fry… I don’t have a cast iron skillet. Should I put oil in the pan? I’m confused haha! I’m horrible at frying.
LikeLike
Hey there! No matter which type of pan or skillet you use, the goal is to have just enough oil so that the cutlets don’t stick. Also, resist temptation to lift the cutlets up if you know they aren’t finished cooking on one side – until they start to brown, they’ll stick to the pan – and then they might tear or crumble.
It’s really pretty easy – just keep your heat at medium or low/medium, lightly oil, and don’t flip too soon. I hope you like them as much as I do!
LikeLike
Okay that helps a lot! I’ll try them one night this week and will let you know how they turn out!
LikeLike
Pingback: Spaghetti Squash & Chickpea Cutlets
Pingback: Vegan Night at Linnet’s | Linnet Moss
Really? FOUR tablespoons of toasted sesame oil: that’s a freakin’ 1/4 cup! This is strongly flavored stuff that I’m used to adding by the 1/2 tsp or so. It doesn’t end up just tasting like sesame oil to the nth degree??
LikeLike